Chain Gang. Tech Focus: Timing Chains. If you’re feeling brave, we show you how to replace your N42’s timing chain. The N Series four-cylinder petrol engines have a less than glowing reputation for timing chain problems but is this justified or not? Words and photography: Andy Everett.
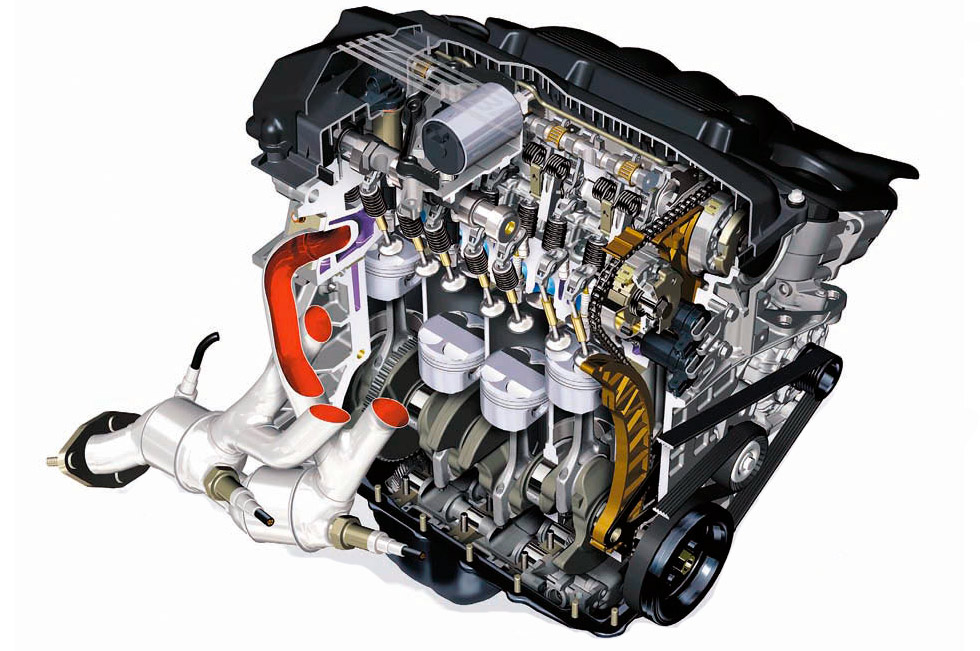
style=”flat” size=”4″]When it arrived here in late 2001 the all-new N42 Valvetronic engine gained a lot of good press. After all, despite its mind-boggling complexity, it offered the same power as the 1.9-litre M44 16-valve as seen in the Z3 and the final 318Ti Compacts and was a bit more economical, too, although the gains were pretty minor. There was talk of the engine being developed with Rover and an all-new factory in Hams Hall in the West Midlands was established in order to build the new engine. The N42 gave way to the almost identical N46 in 2004 (VVT operation was now by the engine ECU rather than a separate ECU) and this unit ran until it was replaced by the N43 towards the end of E90 production; even so, the bottom end is very similar and the chain setup very similar, too. There were two non-Valvetronic engines: the N45 used as a 1.6-litre in the 116i without any balance shafts; and the N45 2.0-litre used in the 320Si homologation special.
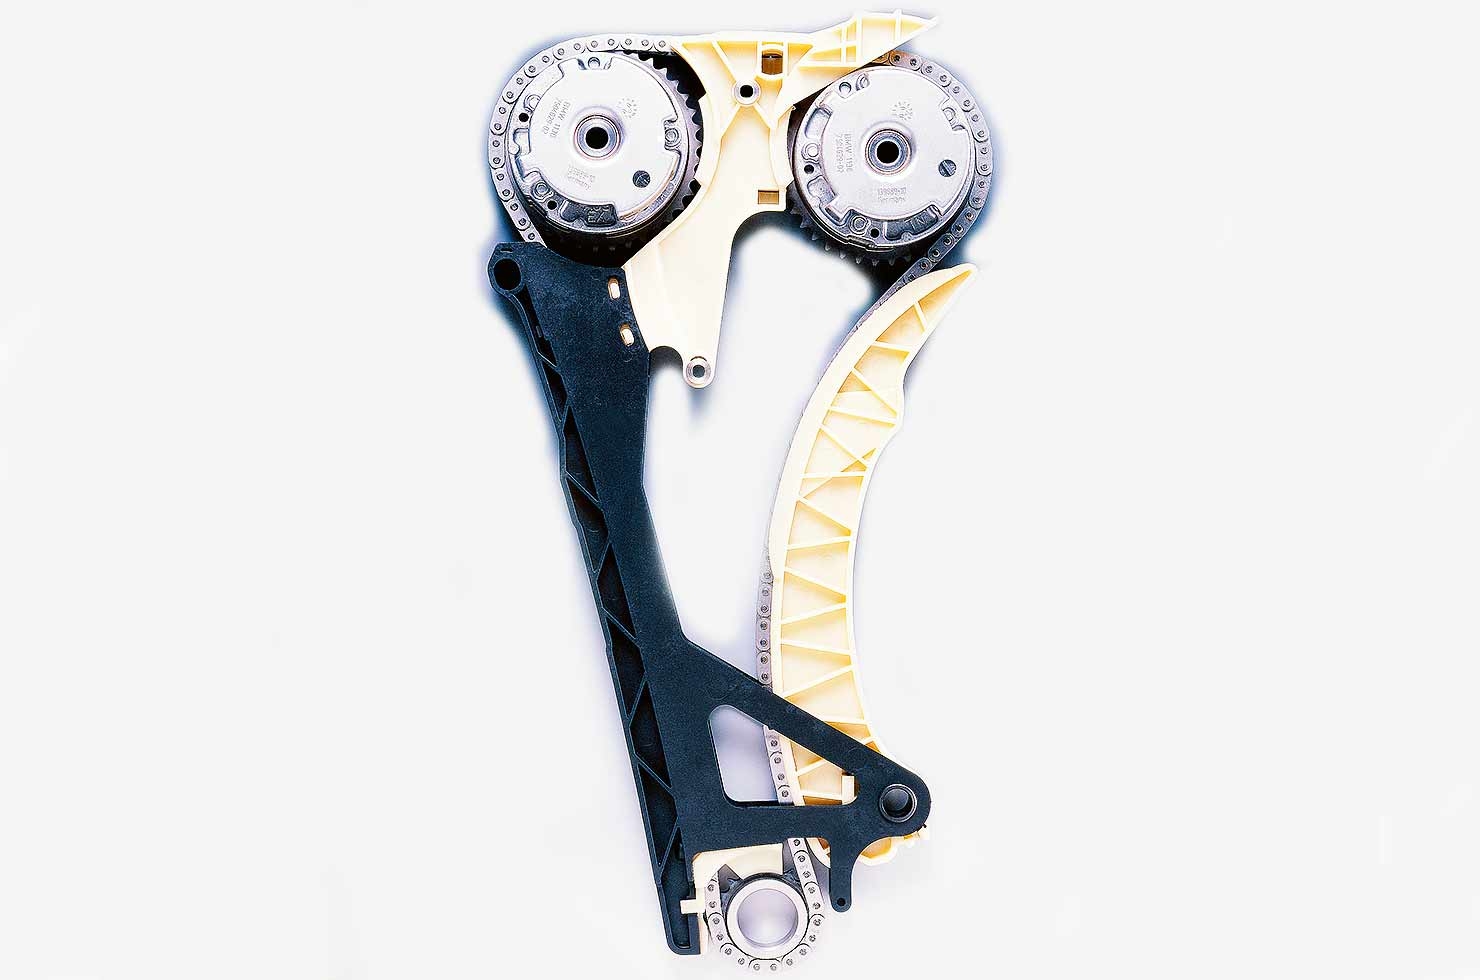
The construction of the N engine is unusual as there is no removable front timing cover. Instead, the chain and tensioner/guide rail assembly is lowered into the engine in one cassette type unit with four Torx bolts securing it; two are T45 female and the other two are T20 male. Three of these are hidden behind screwed-in blanking plugs and are easy to remove. Be aware that whilst the job is pretty similar, the direct injection N43 needs a different locking tool set.
Replacing the chain assembly is, if everything goes to plan, no worse than replacing a modern cambelt. Febi chain kits are almost all exactly the same specification parts as those used and supplied by BMW. The chain is the same Jwis-made item and there are various outlets to buy from; a quick internet search will quickly find them. These engines also like to sweat oil from the various seals and so it’s worth spending a few extra quid and replacing various seals, such as the crankshaft oil seals as well as the O-rings for the Vanos solenoids (ours were supplied by Sytner BMW in Sheffield). These days you can buy the locking tool set for around £30 and whilst you should go to BMW for oil seals and gaskets, the only place to get the chain kit from is Febi.
Febi is part of the Bilstein group and its ProKit has everything you need – chain, lower sprocket, new tensioner plunger, crankshaft and Vanos unit bolts and new chain guide retaining bolts. But it’s not all plain sailing and so here are a number or pointers. This isn’t a warts and all workshop manual but it will give you a good idea of why this job is quite expensive – about £700 from a specialist.
We are indebted to both Febi UK and Sytner BMW Sheffield for the supply of parts. Whilst the chain kit is cheaper, you ideally need to go to BMW for the gaskets and oil seals. Once the job is done, you’ll need to have the adaptations for timing and valve lift reset. This takes around 20 minutes with the correct diagnostics.
CHAIN ESSENTIALS

• The crank centre bolt is tightened to 300Nm. You will need a three-quarter-inch breaker bar and 22mm socket to undo it and a three-quarter-inch drive torque wrench to tighten it. These are stretch bolts so never reuse the old bolt! You will need to lock the flywheel teeth with a screwdriver in the hole at the base of the bellhousing and disconnect the top radiator hose to give you room to swing on the bar.
• As well as a new crank bolt, you must always replace the Vanos retaining bolts as well (the Febi ProKit comes with these in the box). Tighten them with the cam locks fitted, the Vanos alignment tool fitted, the engine at TDC, and the slack just taken out of the chain with the screw-in tool in the locking tool set.
• When the chain assembly comes out inspect it and pray no bits of the nylon rails have broken off. Compare old with new. If they have, the sump will need to be dropped and the bits fished out or else they will end up in the oil pick up strainer with predictable results. Don’t take a risk and skip this bit!
• Dropping the sump is a horrible task. Be assured that it is impossible without the front crossmember dropped down, so don’t even try. You will need to buy or hire an engine support bar to take the weight of the engine whilst the four crossmember bolts are removed after you have disconnected the steering column lower joint from the rack.
• Trying to insert the flywheel locking pin is very difficult but it is essential. You are not better off using a dial gauge down number one plug hole to set it to TDC because you are guaranteed to get the cam timing wrong. The balance shafts shouldn’t move but get an assistant to watch the sprocket as you realign it all. Before starting it up, remove the plugs and turn the engine over by hand.
• We’d only use the genuine Febi kit – the parts are exactly the same spec supplied to BMW whereas many other chain kits are non-genuine and some are pretty grim. The Febi part number for the kit with crank sprocket is 47662; without the crank sprocket it’s 33846.
1 This is what the N42 and N46 look like in an E46; the E90 is near enough the same. Getting the cam cover off is hard work. The rear pollen filter housing including lower section, coil packs and the upper engine loom are disconnected.
2 With the cam cover off, it looks like the cam timing is out but this is what it’s supposed to look like at TDC. The inlet cam appears to be advanced compared top the inlet but trial-fitting the locking tool proves that it’s certainly in the right area.
3 This is the £30 locking tool set. The gold bar is the Vanos locking tool. Below on the left is the screw-in chain tension adjuster, and to the right is the exhaust cam lock. Under that is the inlet cam lock. At the pins on the left are the crank locks.
4 Lock the crank with a big screwdriver wedged into the flywheel teeth and, using a three-quarter-inch breaker bar, undo the 300Nm centre bolt. Disconnect the top rad hose to avoid damaging it and to give more room. Always fit a new bolt as well.
5 Now to fit the cam locks. This is the exhaust side and it fits on like this. On our cheap and cheerful locking tool set I had to fettle the righthand side with a grinder to allow the exhaust side locking tool to fit. It was cheap, so no complaints.
6 Here is the inlet cam lock fitted. It’s tricky to fit and you’ll probably need to tweak the cam around slightly so that it fits. On both cams you’ll need to fit the locking tools in order to undo the very tight Vanos to cam stretch bolts – they’re done up to 20Nm – and angle tighten 90 degrees and 90 degrees again.
7 Now we need to remove the chain tensioner plunger. Doing this will make the chain go nice and slack and make the Vanos units really easy to remove. You’ll need a 22mm ring spanner as shown here – the Febi kit comes with a new unit.
8 You’ve already undone the two 16mm Vanos bolts, so now they can be wriggled free from the cam and out from under the chain. They don’t fit back on in any particular order but it won’t harm to make cam to Vanos alignment marks now.
9 Now the Vanos solenoids come out – just remove a 10mm bolt for the retaining plate, and the electrical plug connector and they’re free. Always fit new O-ring seals. We got our new seals from Sytner BMW in Sheffield – they aren’t expensive at all.
10 Next, the bolts securing the chain rail assembly to the engine block need to be removed. These are mainly hidden under three of these screw plugs that are undone with a 5mm Allen key. Smear the threads with grease on reassembly.
11 With the final top Torx bolt removed, the whole chain and tensioner cassette is lifted out as shown. Be really careful here so as now to disturb the oil pump and balance shaft sprocket. Inspect for broken bits – any missing bits – sump off!
12 This photo was taken before the chain cassette was lifted out. It shows the timing sprocket. It doesn’t slide onto the end of the crankshaft but rather the crank pulley boss fits inside it and it relies on 300Nm of bolt torque to keep it still.
13 Here is the Febi ProKit. It includes chain, lower sprocket, the three main bolts, tensioner and rails. Depending on the supplier, it retails for around £100. That’s about half what BMW charge for the same stuff.
14 This photo shows how it all goes together, although here the upper and lower rails aren’t clipped together. As you can see, the white tensioner blade pivots on the black main frame and it’s the white nylon parts that turn orange and brittle with age.
15 Given how these engines love to leak oil it would be advisable to replace at least the crankshaft oil seal at this stage. Carefully remove it with a small flat blade screwdriver and a hammer, tapping the new one into place after dipping it in fresh oil.
16 Here is one of the two Vanos solenoids showing the oil seal O-ring that loves to sweat oil. It goes rock hard with age and the two new ones we got from Sytner Sheffield will stop that. It’s worth replacing them both every five years regardless.
17 This photo was taken with both the old 125,000-mile chain laid out next to the new one – it has extended by about two to three millimetres due to wear in the chain link pins. Chains on these rarely break but they can certainly stretch enough to jump teeth.
18 Here is the chain assembly fitted (with the top retaining bolt yet to go in) but the Vanos locking tool fitted into the Vanos plates. These plates actually give readings to the cam sensors so must be in the right place as the bolts are torqued up.
CONTACT: Febi UK / Tel: 01977 699777 / Web: www.febi.com, www.febilive.com / Sytner BMW Sheffield / Tel: 0114 270 2236 / Web: www.sytnersheffieldbmw.co.uk


